|
1. INTRODUCTION.
Good workmanship shows up in lacing
and binding done with the skill and neatness that prove pride in workmanship.
This is one place where you can't count
on a coat of paint to hide a poor job.
2. PURPOSE OF LACING AND BINDING.
Conductors within an equipment, panel
box, or junction box need to be kept in
place; otherwise the wiring makes a maze
that is not only untidy, but is hard to
trace and confusing when changes or
repairs are needed. When the conductors
are properly laced, they support each
other and make a single, neat cable.
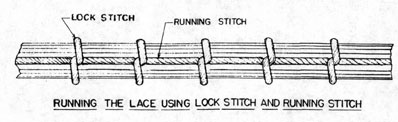
3. METHODS.
When a cable is laced, the individual
conductors should be laid straight and.
parallel to each other; they should not be
twisted together. Straight cabling makes
a smooth job in which each conductor
can be traced; twisted wiring makes a
lumpy, rough-looking cable in which wires
cannot be traced.
4. LACING MATERIALS.
A waxed cord, called lacing cord, is
used for binding the conductors. The
cord comes in two sizes; #6 is used for
small or medium sized cables, #8 is used
for larger cables.
|
|
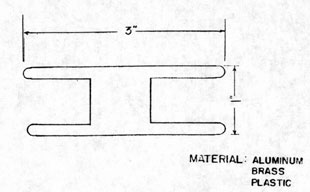
A shuttle on which the lacing cord can
be wound makes it easier to handle the
cord. The construction of such a shuttle
is shown in Figure 9-58. It may be
made of aluminum, brass, fiber, or plastic;
steel is not recommended because of
rusting.
5. LENGTH OF CORD.
The amount of cord needed to lace a
cable is about 2 1/2 times the length of
the cable run, if single cord is to be
used, or about 5 times if double cord is
to be used.
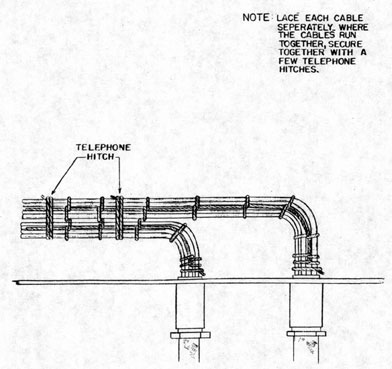
6. SPARES.
Always serve spares separately and
secure to actives with a few telephone
hitches to avoid complete re-lacing in
the event spares are utilized.
7. STARTING.
If the shuttle is to be used, wind on
enough cord to fill it. Cord for double
lacing should be spooled off and doubled
before winding into the shuttle; start
the two loose ends onto the shuttle first
so as to leave a loop at the starting end.
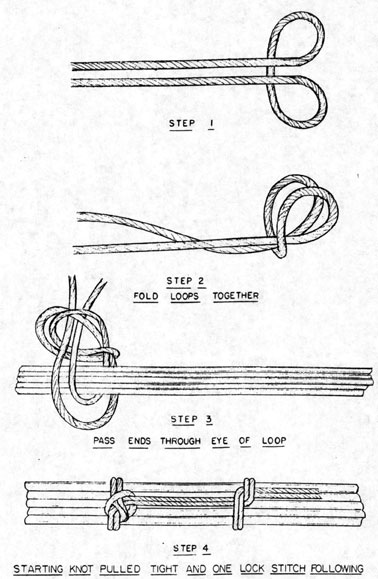
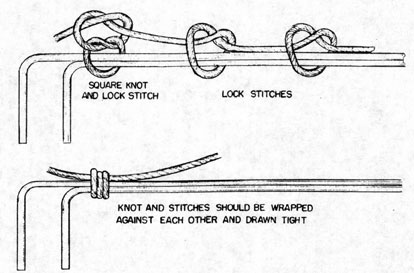
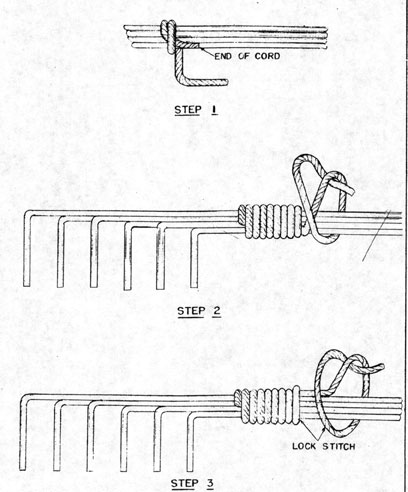
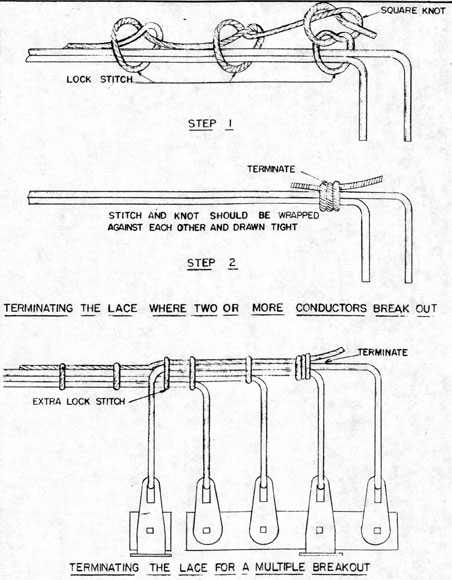
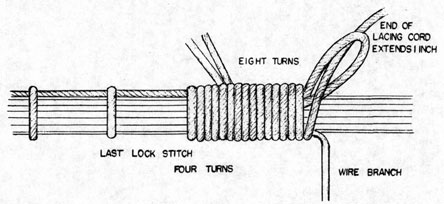
In starting a lace, a telephone hitch,
Figure 9-59, square knot, Figure 9-60
or lock stitch, Figure 9-61 may be used.
Note that when the telephone hitch is
used, at least two hitches should be made
at the start, and when the lock stitch
is used, wrap 10 to 12 turns tightly around
cable.
|